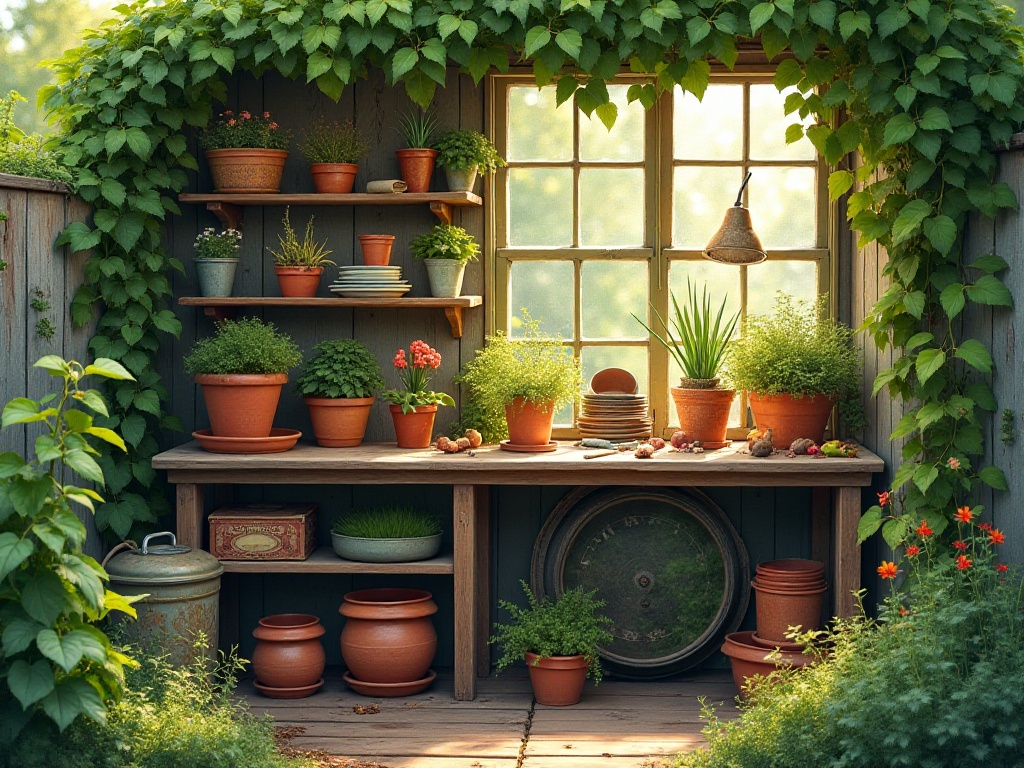

Choosing the Right Location
Did you know? When I first started growing plants, I thought I could grow them anywhere on the balcony. The result? The plants I bought wilted within days. Later I realized how important location was. Honestly, this lesson really hurt for quite a while, considering those plants were bought with real money!
First, consider sunlight. Most plants need at least 6 hours of sunlight daily. My balcony faces south with plenty of sunlight, so I chose sun-loving roses and sunflowers. Every morning when I open the curtains and see sunlight falling on the petals, it's incredibly therapeutic! But if your balcony faces north, I recommend growing shade-tolerant plants like pothos or aloe vera. Many beginners overlook the sunlight issue, thinking plants can survive anywhere. In reality, insufficient light leads to problems like leggy growth, yellowing leaves, and dropping flower buds.
I discovered an interesting phenomenon: even on the same balcony, light intensity varies greatly in different spots. For example, areas near glass doors get the best light, while corners tend to be darker. Now I arrange different plants' "assigned seats" based on their needs. Roses, being the "boss," naturally get the best spots!
Next is water access. I place my pots near the faucet for convenient watering. Putting them in the farthest corner of the balcony would make carrying watering cans back and forth exhausting. Speaking of which, I must complain about my previous "genius design." When I first started gardening, I thought the balcony corner looked better visually, so I put all the pots there. As a result, I had to carry heavy watering cans across the entire balcony, not only tiring but also spilling water everywhere. Looking back, it was really silly!
Besides light and water access, I've figured out some other location tips. For instance, consider ventilation. Plants need to breathe, and poor ventilation can lead to pests and diseases. However, don't place them in areas with too much wind, or they'll get blown around. My balcony sometimes gets strong winds, so I placed small windbreaks next to some pots, ensuring ventilation while protecting the plants.
Temperature is also crucial. In summer, certain balcony spots get extremely hot from the sun, so I adjust pot positions or use shade cloth. In winter, be mindful of cold protection, especially near glass where temperature fluctuates significantly.
Regarding placement, consider growth space. Initially, I arranged pots very densely, thinking it looked more lively. But as plants grew, they not only blocked each other's sunlight but also affected ventilation, and growth was stunted due to limited space. Now I leave adequate growing space for each plant to thrive comfortably.
Finally, there's the height issue. I found that layering plants works really well. Placing shorter plants in front and taller ones behind creates clear visual layers while ensuring each plant gets sufficient light. I also bought some plant stands to utilize vertical space, making the whole balcony look both neat and verdant.
Soil Matters
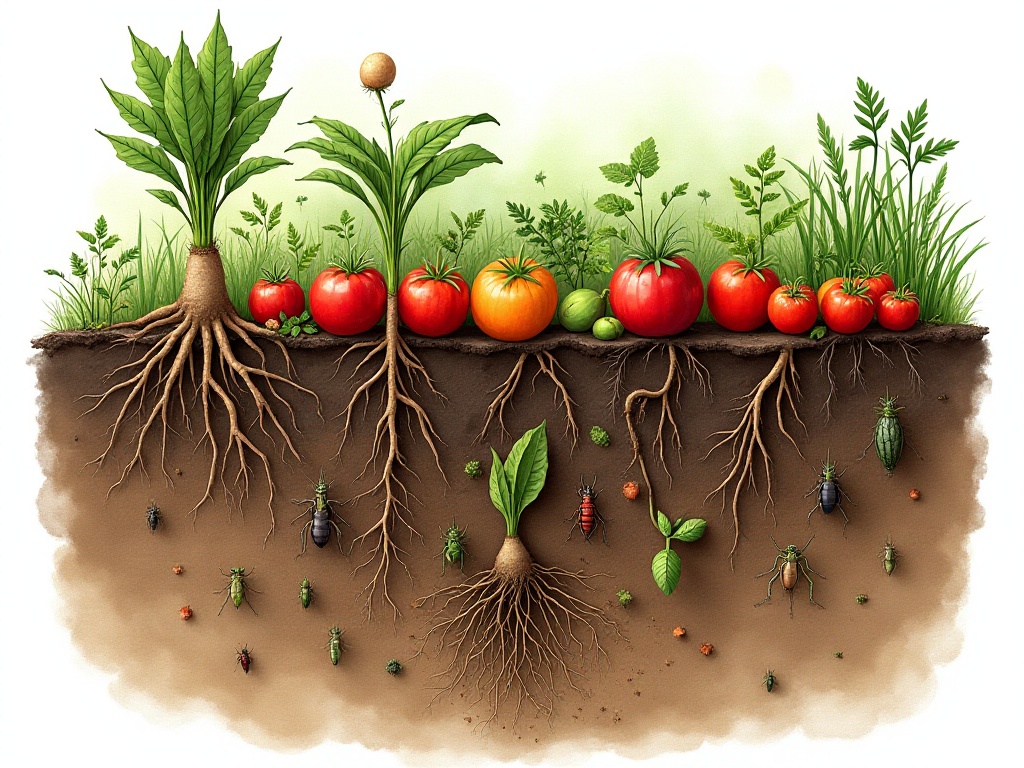
What's most crucial for growing plants? Definitely the soil. I remember when I first started gardening, I just used random dirt from the ground, resulting in sickly plants. I was so worried during that time - despite daily careful attention, the plants remained droopy. Later I learned that soil quality determines plant growth. Just like humans need good food to grow healthy, plants need quality "food" too!
Speaking of soil, you can't just use any dirt. Good planting soil should have several characteristics: loose and airy, good water and nutrient retention, rich in organic matter. The soil I use now is specially mixed: garden soil, river sand, and leaf mold in specific proportions, plus some vermiculite and perlite. This mixture provides both aeration and water retention, allowing roots to develop fully.
The simplest way to improve soil is adding well-rotted compost. From my experience, mixing compost with original soil in a 3:7 ratio works best. Compost not only provides nutrients but also improves soil structure. I was worried it would be complicated at first, but it's actually quite simple. Now I improve the soil every time I repot, and the plants grow more vigorously.
Soil pH is also important. Different plants prefer different soil environments. For example, hydrangeas like acidic soil, while mint is more adaptable. I bought a simple soil testing pen to regularly check soil pH, allowing timely adjustments.
Another crucial issue is drainage. I learned this lesson the hard way when poor drainage caused root rot. Now I place a layer of broken pottery or stones at the bottom of pots, followed by coarse sand, before adding potting soil. This ensures excess water drains properly, preventing root rot.
Remember one thing: never turn soil when it's wet. I made this mistake before, resulting in soil that became as hard as cement, suffocating plant roots. Now I wait until the soil is semi-dry before turning it, which preserves soil structure while maintaining looseness.
For soil maintenance, I've developed a tip: regular soil loosening. Especially after rain or watering, the soil surface tends to form a crust. Using a small trowel to gently loosen the surface soil helps maintain aeration. However, be gentle to avoid damaging plant roots.
Soil maintenance also requires timely nutrient replenishment. I now add organic fertilizer in spring and fall, reducing the amount in summer. This maintains soil fertility without harming plants.

Sowing Has Its Rules
Many novice gardeners face this issue: how exactly do you sow seeds? Honestly, I was clueless during my first attempt. It was such a mess - seeds scattered everywhere, and when they sprouted, they were all crowded together. It was a complete disaster.
Looking back, sowing is actually a skilled task. First, choose the right sowing time. Many plants have optimal sowing seasons - sunflowers are best sown in spring, while chrysanthemums are better in late summer or early fall. Choose the right timing, and success rates naturally increase.
Preparation before sowing is also important. I now soak seeds in warm water for several hours to soften the seed coat and improve germination rates. Some seeds need special treatment - sunflower seeds, for instance, are best disinfected with mild salt water to prevent pests and diseases.
For tiny seeds like mustard or lettuce, I use tweezers or a damp toothpick. This allows precise placement and prevents overcrowding. It might seem fussy at first, but once you get used to it, you'll find it not only saves seeds but also makes later management easier.
Sowing depth matters too. Generally, seeds should be planted at a depth of 2-3 times their diameter. Too deep, they won't germinate easily; too shallow, they might blow away or get eaten by birds. I now measure with a ruler - it might seem perfectionist, but it really works well.
Here's a useful trick: seedling pots made from old paper. Roll newspaper into small tubes, fold and secure the bottom to make biodegradable seedling pots. When seedlings grow bigger, plant them directly with the pot - it's both eco-friendly and convenient. I've been using this method for over a year and love it. It saves money and doesn't damage roots during transplanting.
Post-sowing management is crucial too. I cover seedling pots with plastic film to maintain proper temperature and humidity. But remember to lift the film daily for ventilation to prevent mold. Once seeds germinate, remove the film promptly to let seedlings bask in sunlight.
Temperature management during seedling growth is especially important. Different plants need different germination temperatures. I now use a thermometer to monitor the environment and sometimes use heating mats to adjust temperature. While initial investment seems higher, success rates have definitely improved.
Thinning seedlings is also a skilled task. When seedlings develop 2-3 true leaves, it's time to thin. I now keep the strongest ones and reluctantly cut the others. It was hard to do at first, but experience shows this is best for the remaining plants.

Maintenance Has Its Ways
Watering is the most basic maintenance task. But do you know how to water properly? When I first started gardening, I made a mistake: watering whenever the soil surface looked dry, resulting in too frequent watering that caused root rot. I was so worried during that time, seeing plants wilting daily but not knowing what was wrong.
Later I learned that watering is actually a science. Different plants need different watering methods. Succulents are drought-resistant and need less frequent watering; while water-loving plants like hydrangeas need consistently moist soil. I now adjust watering amount and frequency based on different plants' characteristics.
The correct watering method is: deep watering 1-2 times per week, ensuring water penetrates to the roots each time. This promotes downward root growth, making plants stronger. Timing is also important - best to water in early morning or evening, avoiding watering under strong sunlight to reduce evaporation.
I discovered a useful trick: insert your finger 2-3 centimeters into the soil - if it feels moist, don't water; if dry, water is needed. This method is simple yet more accurate than judging by surface appearance.
Speaking of watering, water quality matters too. Tap water should be left to stand for a day to let chlorine evaporate. During rain, I collect rainwater for plants - they seem to especially enjoy rain's nourishment.
Pruning is another important maintenance aspect. Regular pruning maintains plant aesthetics, promotes branching, and increases flowering. However, different plants have different pruning times and methods. For roses, remove spent flowers promptly to encourage new flower buds.
Pest and disease control is a major topic. Prevention is better than cure - I now regularly inspect plants and address issues promptly. For common pests and diseases, I prefer physical or biological control methods, like using soapy water for aphids or vinegar solution to prevent mold.
As for fertilizing, my advice is "less is more." Over-fertilizing can burn plants. I use half the recommended amount on labels, which works very well. Timing matters too - fertilizing during vigorous growth periods is most effective.
Another important maintenance aspect is repotting. As plants grow, original pots may become too small, requiring larger ones. Spring is the best time for repotting, when plants are in growth phase and adapt easier to new environments.

Money-Saving Tips
Who says gardening must be expensive? Here are some money-saving tricks. After a year of practice, I've found gardening can be quite economical - the key is knowing certain techniques.
For instance, collecting seeds. The sunflowers on my balcony now are all from last year's saved seeds. After flowers fade, collect the seeds for next year's planting. Not just sunflowers - many annual plants' seeds can be saved. I've accumulated quite a collection now, feeling especially accomplished during sowing season.
Seed collection has its techniques. Choose healthy plants with good characteristics for seed saving, harvest only when seeds are fully mature. Collected seeds should be dried and stored in paper bags, remembering to label varieties and collection dates. This prevents mix-ups next year.
Propagation through cuttings is another money-saving method. Many plants can be propagated this way, like pothos and roses. I often exchange cuttings with other plant enthusiasts now, saving money while increasing plant varieties.
Speaking of cuttings, I've gathered some experience. First, select healthy branches with clean, sharp cuts. Insert them in loose soil, maintaining proper moisture. Some plants can root in water, like pothos, giving higher success rates.
Then there's composting - don't throw away kitchen waste, use it for compost. I collect fruit peels, vegetable leaves, and coffee grounds for composting - both eco-friendly and economical. When I first started composting, I worried it would be troublesome or smelly. But in practice, it's quite simple if you know the method.
Composting has some key points. Control the ratio of dry to wet materials, maintain proper ventilation, turn regularly. I now use a simple compost bin, layering kitchen waste with dry leaves and branches - in about two to three months, you get quality compost.
Pots don't have to be new either. I often use old containers for planting, like old plastic buckets or drink bottles. Just drill some drainage holes at the bottom, and they work perfectly as planters. Sometimes I decorate these "recycled" pots - paint them or add stickers - they look just as good as store-bought ones.
Tools can be economical too. Many gardening tools can be replaced with household items. Use chopsticks as stakes, old toothbrushes to clean pots, old newspapers for seedling pots. These substitutes might be simple, but they're just as practical.
Fertilizers have money-saving methods too. Besides homemade compost, you can use some household "waste." Crushed eggshells provide calcium, coffee grounds adjust soil pH, banana peel water serves as potassium fertilizer. These are all free resources - why not use them?
Concluding Thoughts
After a year of exploration, I finally understand: gardening isn't such a profound science - the key is careful observation and learning from experience. Every failure is a learning opportunity, every success brings incomparable satisfaction.
From initial confusion to now being able to care for these plants skillfully, this process has taught me a lot. I've found gardening isn't just about growing flowers and plants - it's taught me patience and focus. Watching seeds germinate, grow, flower, and fruit is a slow process but full of surprises.
Don't you think these techniques are really down-to-earth? Actually, just mastering these basic principles plus some patience makes anyone a capable gardener. Growing plants doesn't need much complex theory - practice and exploration are key. Everyone can find their own suitable gardening method.
Now, I'm completely in love with this green balcony garden. First thing every morning, I check on my plants, water them, prune them, talk to them. This lifestyle makes me feel especially fulfilled and happy.
I think the most important thing is having a heart that loves plants. As long as you genuinely enjoy it and are willing to invest time and energy, you can definitely grow healthy, beautiful plants. Gardening requires persistence, but when you see your plants blooming brilliantly, all the effort is worthwhile.
By the way, do you have any unique gardening experiences? Welcome to share in the comments. I believe everyone has their own gardening insights - we progress faster by sharing with each other. Let's continue exploring this gardening journey together!